Last summer, I promised to share photos of the completed tile project for our friends! If you didn’t get to read the first blog, TILE PROJECT FOR FRIENDS, I explained how Kent made over 300 tiles by hand for their newly built home. In the following blog, TILE PROJECT: PART II, I shared how the project was progressing. The tiles were installed in the fall, and Kent recently had a chance to stop by and snap some photos! We are so pleased to have Kent’s stoneware tiles enhancing our friend’s home. Now, we need to find some time to make tiles for our kitchen! More to come about that…


TILE PROJECT: PART II
Recently, we fired 336 tiles in our outdoor gas-fueled brick kiln. When we fire that many tiles, the kiln cools very slowly, and it is hard to wait for the results! After taking the kiln to a temperature of 2380 degrees and letting it cool over three days, it was finally ready to unload. If you missed the blog, TILE PROJECT FOR FRIENDS, these tiles are for our friends building a contemporary home near us! The tiles will be a back-splash in their kitchen and look awesome with their marble countertops.
You may notice that the tiles look to be different dimensions than the tiles in the first blog, and that is true! Unfortunately, the first batch of tiles did have a little warping, because they needed a bit more grog in the clay. (Nobody ever said ceramics was easy!) Kent wasn’t happy with them because he wanted the tiles to be perfectly flat, so he mixed in more grog, changed the dimensions, and remade them.
After the bisque firing, he did a light glaze application, so the tiles resembled a stone. This glaze gets more variation and subtle artistic differences when applied thinly.
Kent and I can’t wait to see how the tiles look when installed, and we will share the installation photos soon!

Flat tiles in the kiln!

Stacks of tiles waiting to be packed up.
Adorn your home with handmade tiles.
THE PORCELAIN EXPERIMENT
When Kent talks about making porcelain pottery, people sometimes look perplexed. I imagine they envision Grandmom’s ‘china’ with golden rims and floral motifs, the delicate dinner set that comes out once a year or once in a lifetime. It is hard for people to reconcile the image of those dainty decorative dishes with handmade porcelain pottery, but the two have at least one thing in common.

Spiral-wedged Porcelain Clay
‘China’ vs. Porcelain
The main similarity between ‘china’ and handmade porcelain pots is their similar clay body. For those of you not familiar with clay terms, there are three main types of clay that potters use: earthenware, stoneware, and porcelain. These three main types of clay encompass an endless variety of clay bodies. Clay bodies are unique blends of clays, glasses, and other minerals that have been combined to make a variety of processes and finishes possible.
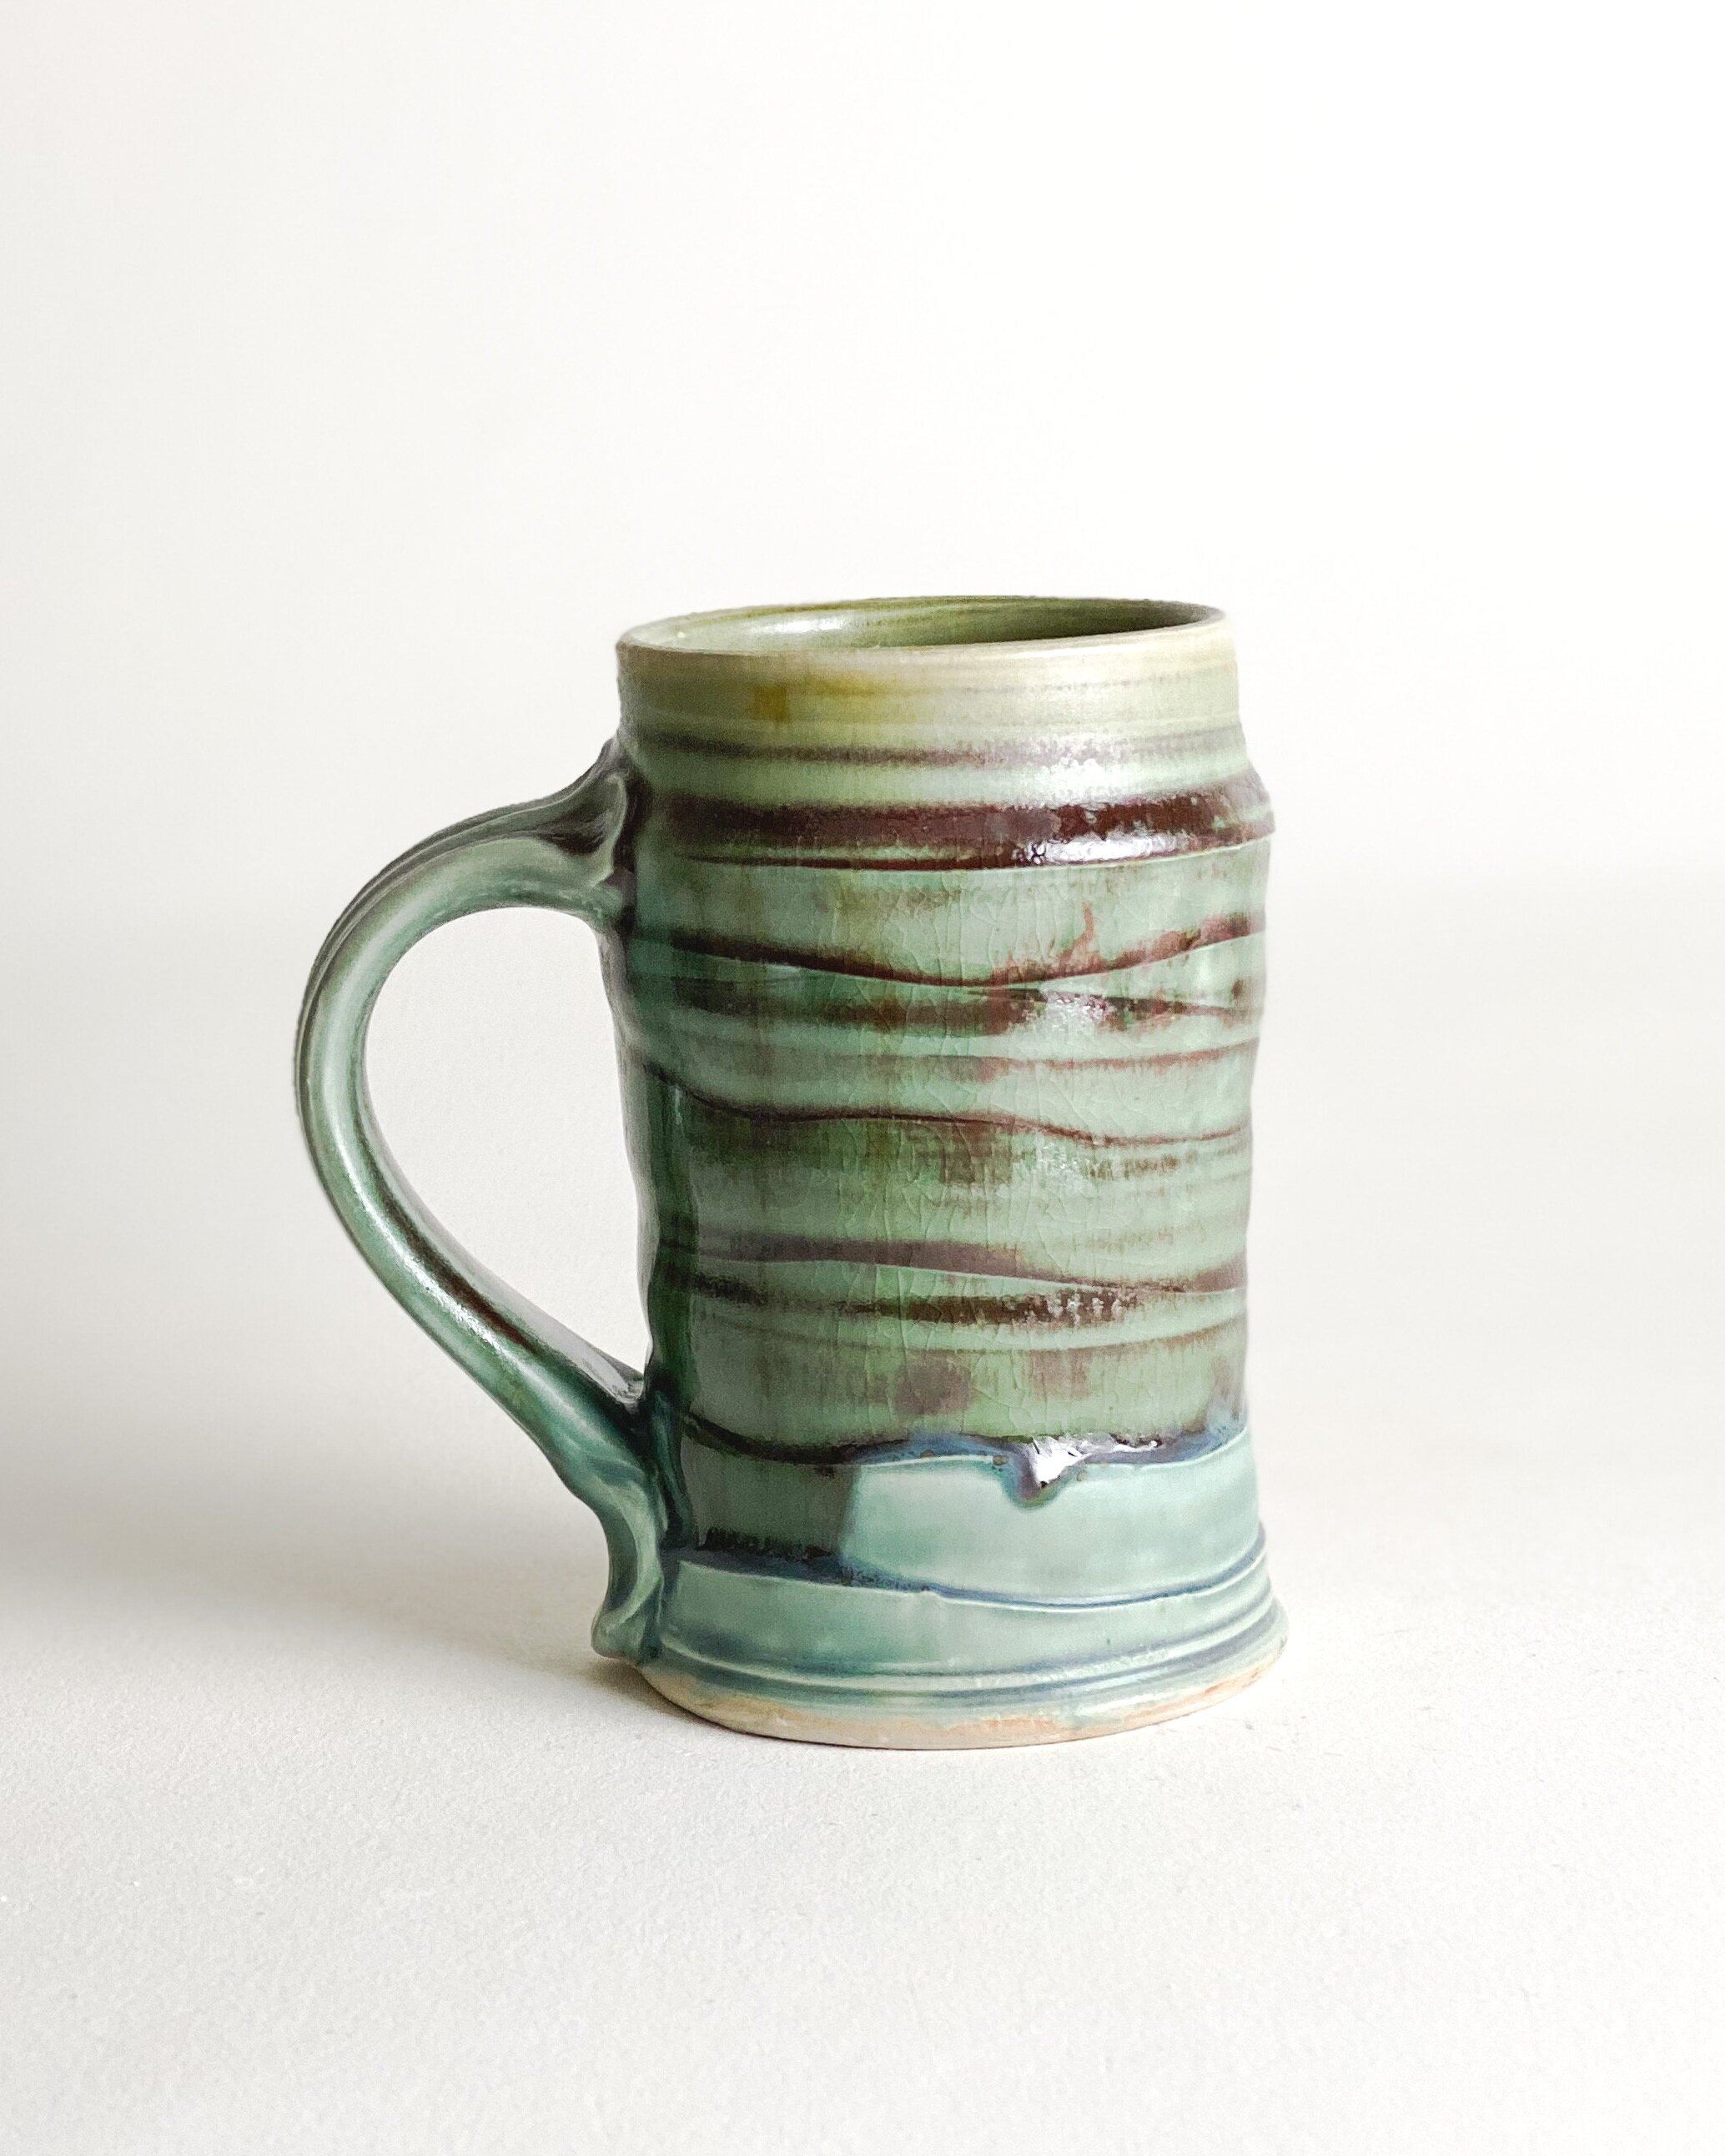
Porcelain Mug by Kent Harris
The 3 Types of Clay
Earthenware clay is a clay that matures at a lower temperature. It can be a variety of colors but is often terracotta or orangy red. Potters that work with majolica glazes often use this clay. It is an excellent option for schools because electric kilns easily fire to the lower temperature required, and bright colors are achieved with little effort. The majority of wheel-throwing potters who make functional ware more often use the second type of clay, stoneware. That is what we typically use at Blue Sage Pottery.
Stoneware clay matures at a much higher temperature than earthenware. It is less porous than earthenware, making it a good option for dinnerware. The absorption of fired stoneware is 1-2 % compared to 10-15 % with earthenware clay. Stonewares are typically strong durable clay bodies that hold up to dishwashing and frequent use. For the last several years, Kent and I have used porcelaneous stoneware. Essentially this is a stoneware clay body that includes a more significant amount of kaolin clay than many other stonewares. It is a light-colored clay which allows the colors of the glazes to stay brighter, yet it has the plasticity of stoneware.

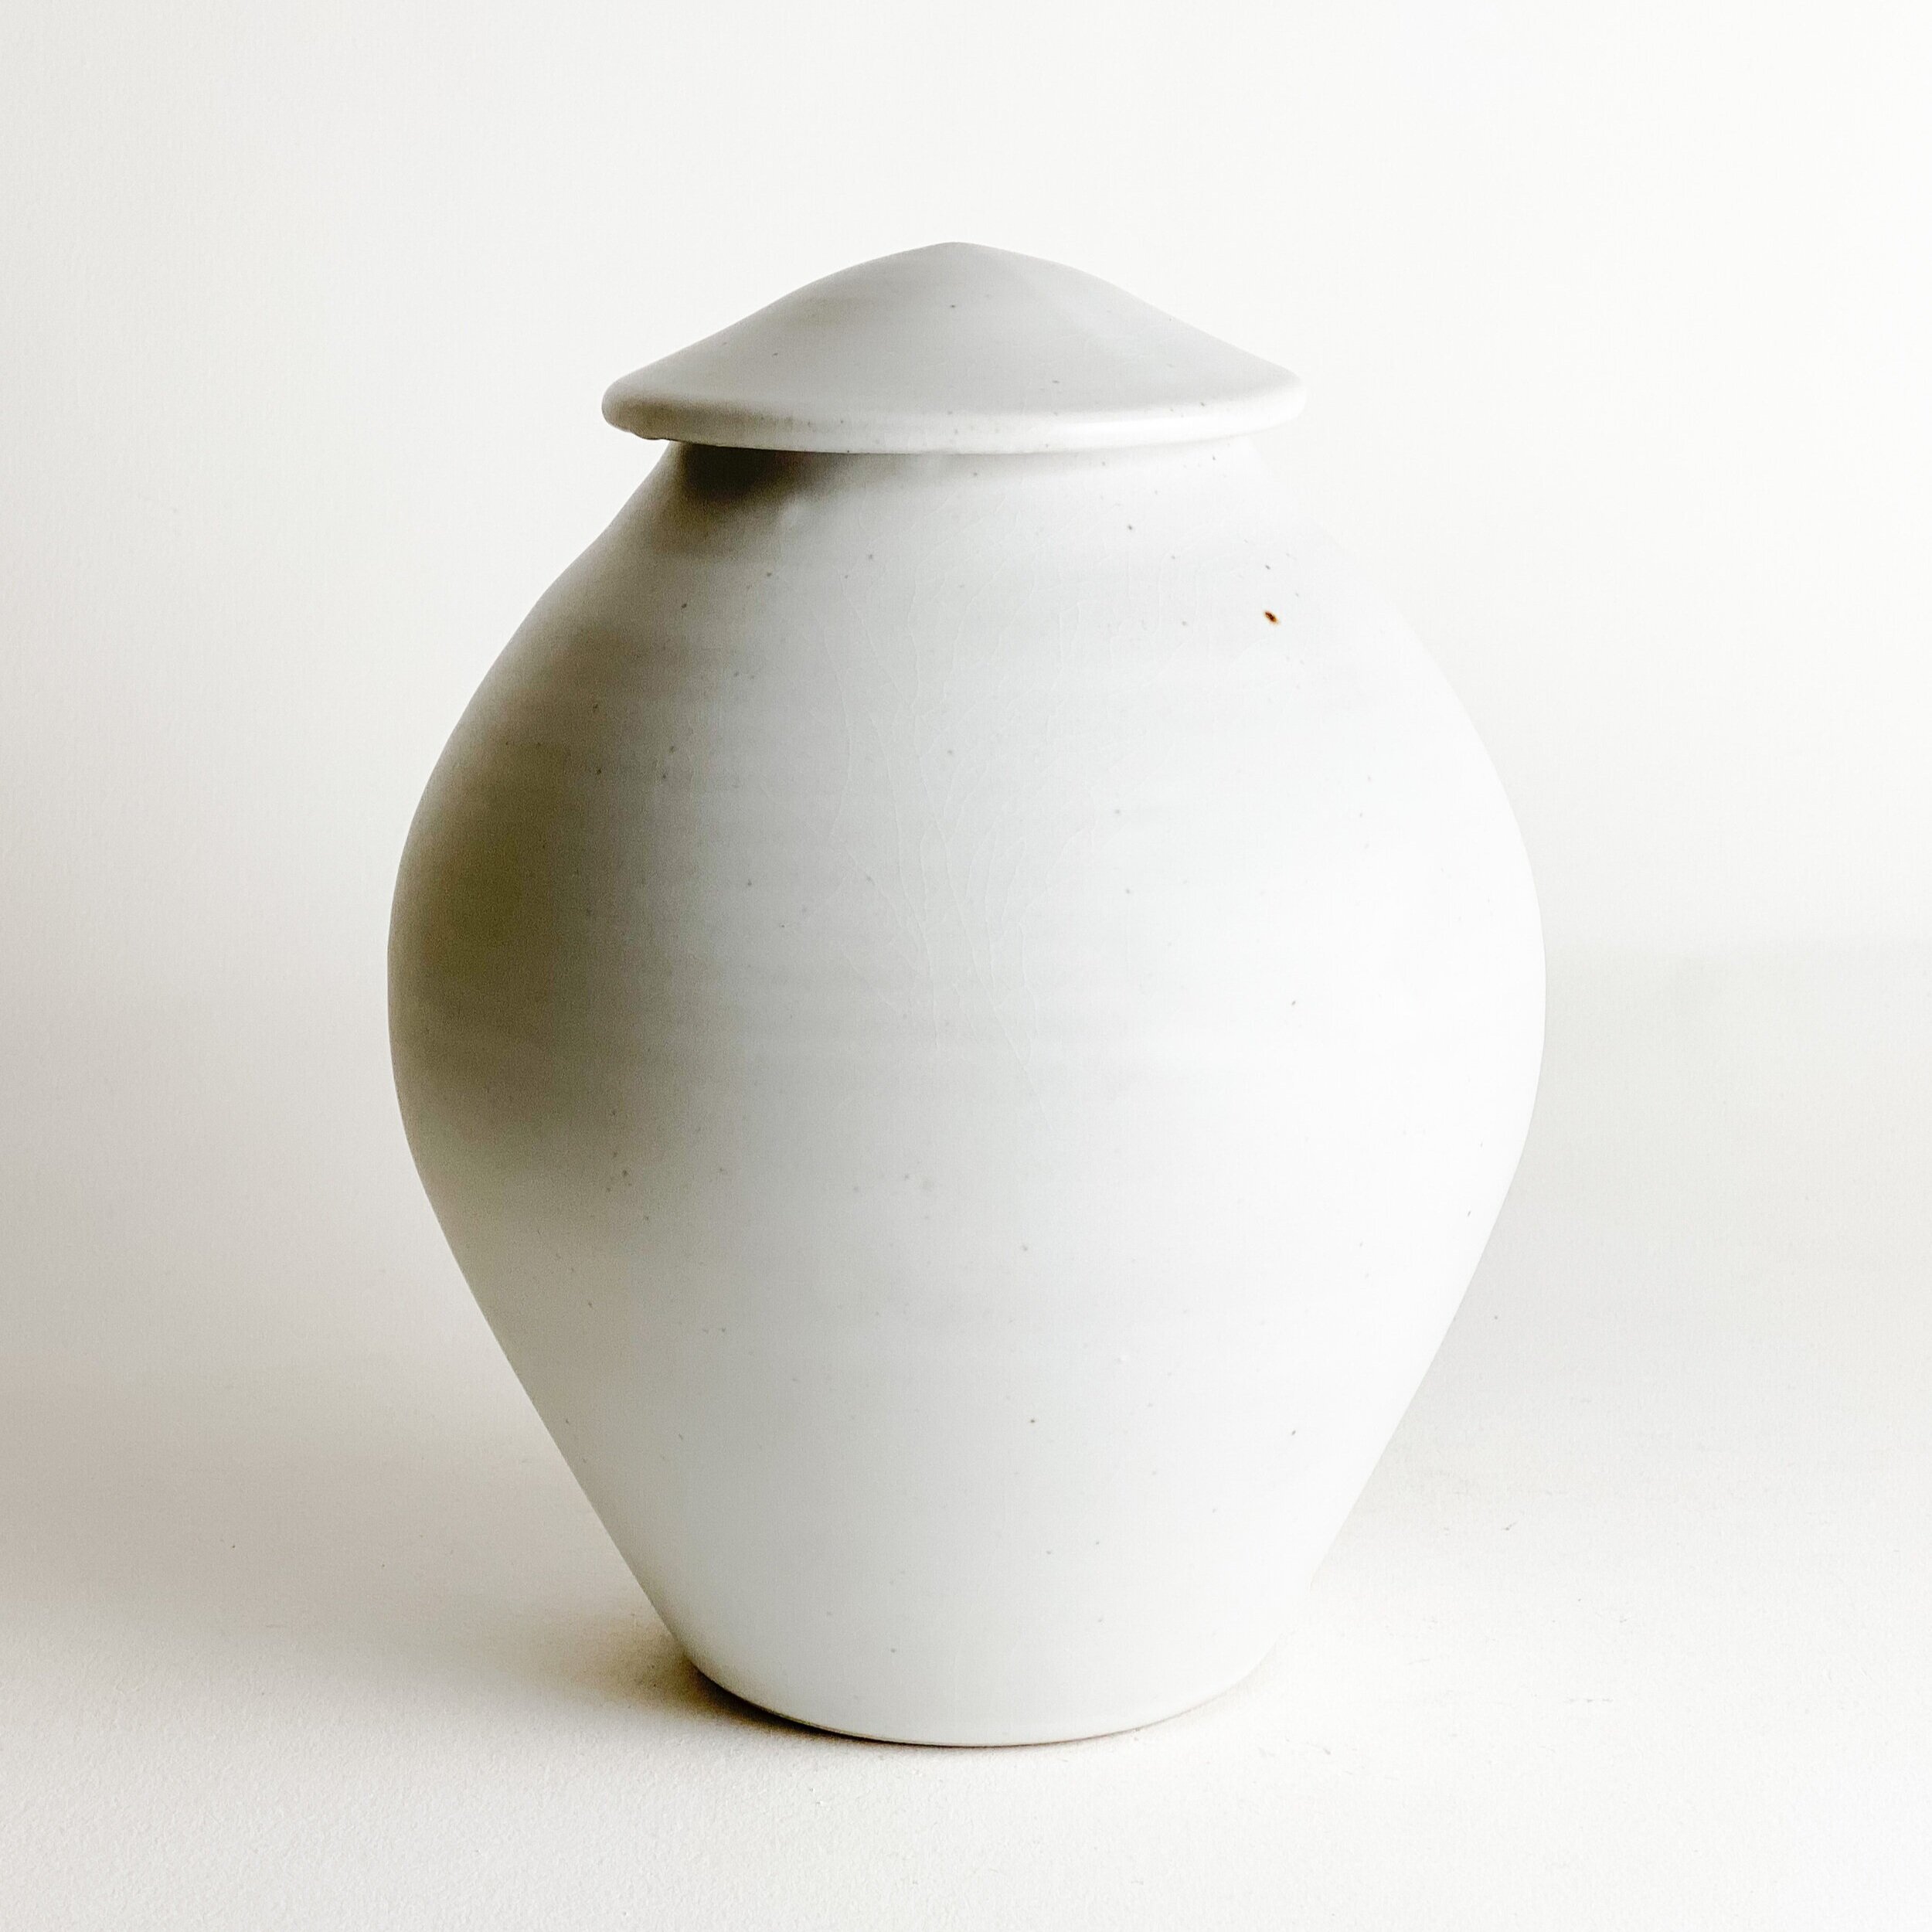
Porcelain Urn with Layered Glazes
Porcelain is the third main type of clay, and like earthenware and stoneware, there are a variety of clay bodies known as ‘porcelain.’ Porcelain is what your grandmom’s ‘china’ is made of. The difference is that manufactured ‘china’ may have up to 30% cow bone ash mixed into the clay blend to achieve the desired characteristics for the industrial processes. Ceramic manufacturers in England and Europe have been mixing animal bone ash into their porcelain bodies since the 1800s. The porcelain clay bodies potters use do not have mixed animal bone ash. We use more pure porcelain clay bodies that blend feldspathic rocks and kaolins.

Porcelain Urns at the Greenware Stage
Porcelain Urn with Clear Glaze
Why Porcelain?
Porcelain is prized by potters for its translucency and resonance. Despite the allure, potters often avoid using porcelain clay bodies because of the notorious working consistency. Porcelain is known to crack while drying and warp during firing. When I tried porcelain for the first time in graduate school, half of my work cracked during the drying process! True porcelains have a high learning curve!
Despite the difficulty of working with porcelain, Kent has recently spent his spare time experimenting with several different porcelain clay bodies. Inspired by Sung Dynasty pots, he began a quest to make elegant porcelain forms with little of the texture he commonly used. He has been particularly interested in making porcelain urns that are ‘light and bright,’ and his pots from our most recent firing fit that description. Because there are no iron or fire clays mixed into the porcelain, like you would find in stoneware bodies, Kent has achieved whites and celadons like never before. Below are examples of some recent porcelain urns.

Porcelain Urns: Standard, Companion, Keepsake and Pet
If you want to check out more of Kent’s porcelain experiments, follow him on Instagram.
Start your own porcelain collection
TILE PROJECT FOR FRIENDS
Roll, cut, smooth. Roll, cut, smooth. Roll, cut, smooth. You get the idea. There is a lot of repetition in the making of handmade tiles! There are also a lot of steps. Roll, cut, and smooth are the first three. Then comes slow, careful drying, bisque firing, glazing, and glaze firing. The main thing about handmade tiles is that they take time! We have found that drying slowly is required to achieve flatter handmade tiles that are easy to install. Yesterday, Kent and our friend Lance spent the entire day rolling out clay tiles and cutting around wood templates Lance made.
Kent and I have done a few tile projects by commission. I have made custom tiles for a wine wall and, more recently, a carved tile for an antique piece of furniture. Kent’s tiles were used in a Parade of Homes House a few years back, and we also tiled our gallery bathroom this past year. It is fun to get off the potter’s wheel occasionally and challenge ourselves to try new things.
Kent and Lance spent an entire day rolling out clay tiles because Lance and his wife Chrissy are building a new home. This is not just any home. Their house has a contemporary spirit reflecting the couple’s design sense. Their home embraces industrial materials and natural finishes, and although it is not yet finished, it inspires house envy in most who drive by! Lance offered to make the tiles with Kent since he has taken classes at Blue Sage Pottery and knows his way around our studio. It means a lot for someone to want your art featured in their home, and Kent is excited about this project. Check back for updates about how they glaze the tiles!

Cutting the tiles around the wood template.

Working on the edges of the tile.

Ready to dry the tiles!
make your home as unique as you
COLORS OF A POT
“How do you get your colors?” This is a question we get a lot from people new to pottery collecting. This question is a lot like asking, “why is the sky blue?”. There is a short and a long answer. Like learning about the color of the sky, the long answer leads one to deepen their understanding of science and art. In today’s blog post, I hope to give anyone interested in our pottery more knowledge about the nature of glazes. To understand how we get the colors in our pottery, one needs to understand what glazes are, how glazes are made, and how the kiln's firing affects the colors.

Kent’s colorful platter bowl from the last firing!
What is a glaze?
A glaze begins as a unique blend of raw minerals mixed to a paint-like consistency. The colors on our pots are glazes applied to bisque ware, pots that have already been fired to about 1753° or Cone 08, and then fired to 2381°, Cone 10, or even hotter! (A cone is a unit of measurement that potters use to determine the temperature of the firing). In the second firing, the applied glaze melts and bonds to the pot, becoming a vitreous glass-like surface that fuses onto the clay.

We make cone packs for each glaze firing to monitor the temperature. We watch the cones melt and bend through the spyholes in the kiln.
How are glazes made?
Glazes are made by weighing out dry minerals and mixing them together following recipes. Each recipe includes at least a glass, a clay, and a flux, which lowers the melting temperature of the glaze mixture. Most recipes include more than one of each and also include minerals that opacify or color the mature glaze.
A glaze recipe is typically written as a 100 gram batch. 100 grams is a small amount of glaze that potters use to make “test tiles”. After lots of experimentation to get the desired glaze, we mix larger glaze batches for our studio. Because we dip-glaze at Blue Sage Pottery, we have to make at least 10,000 gram batches of each color.

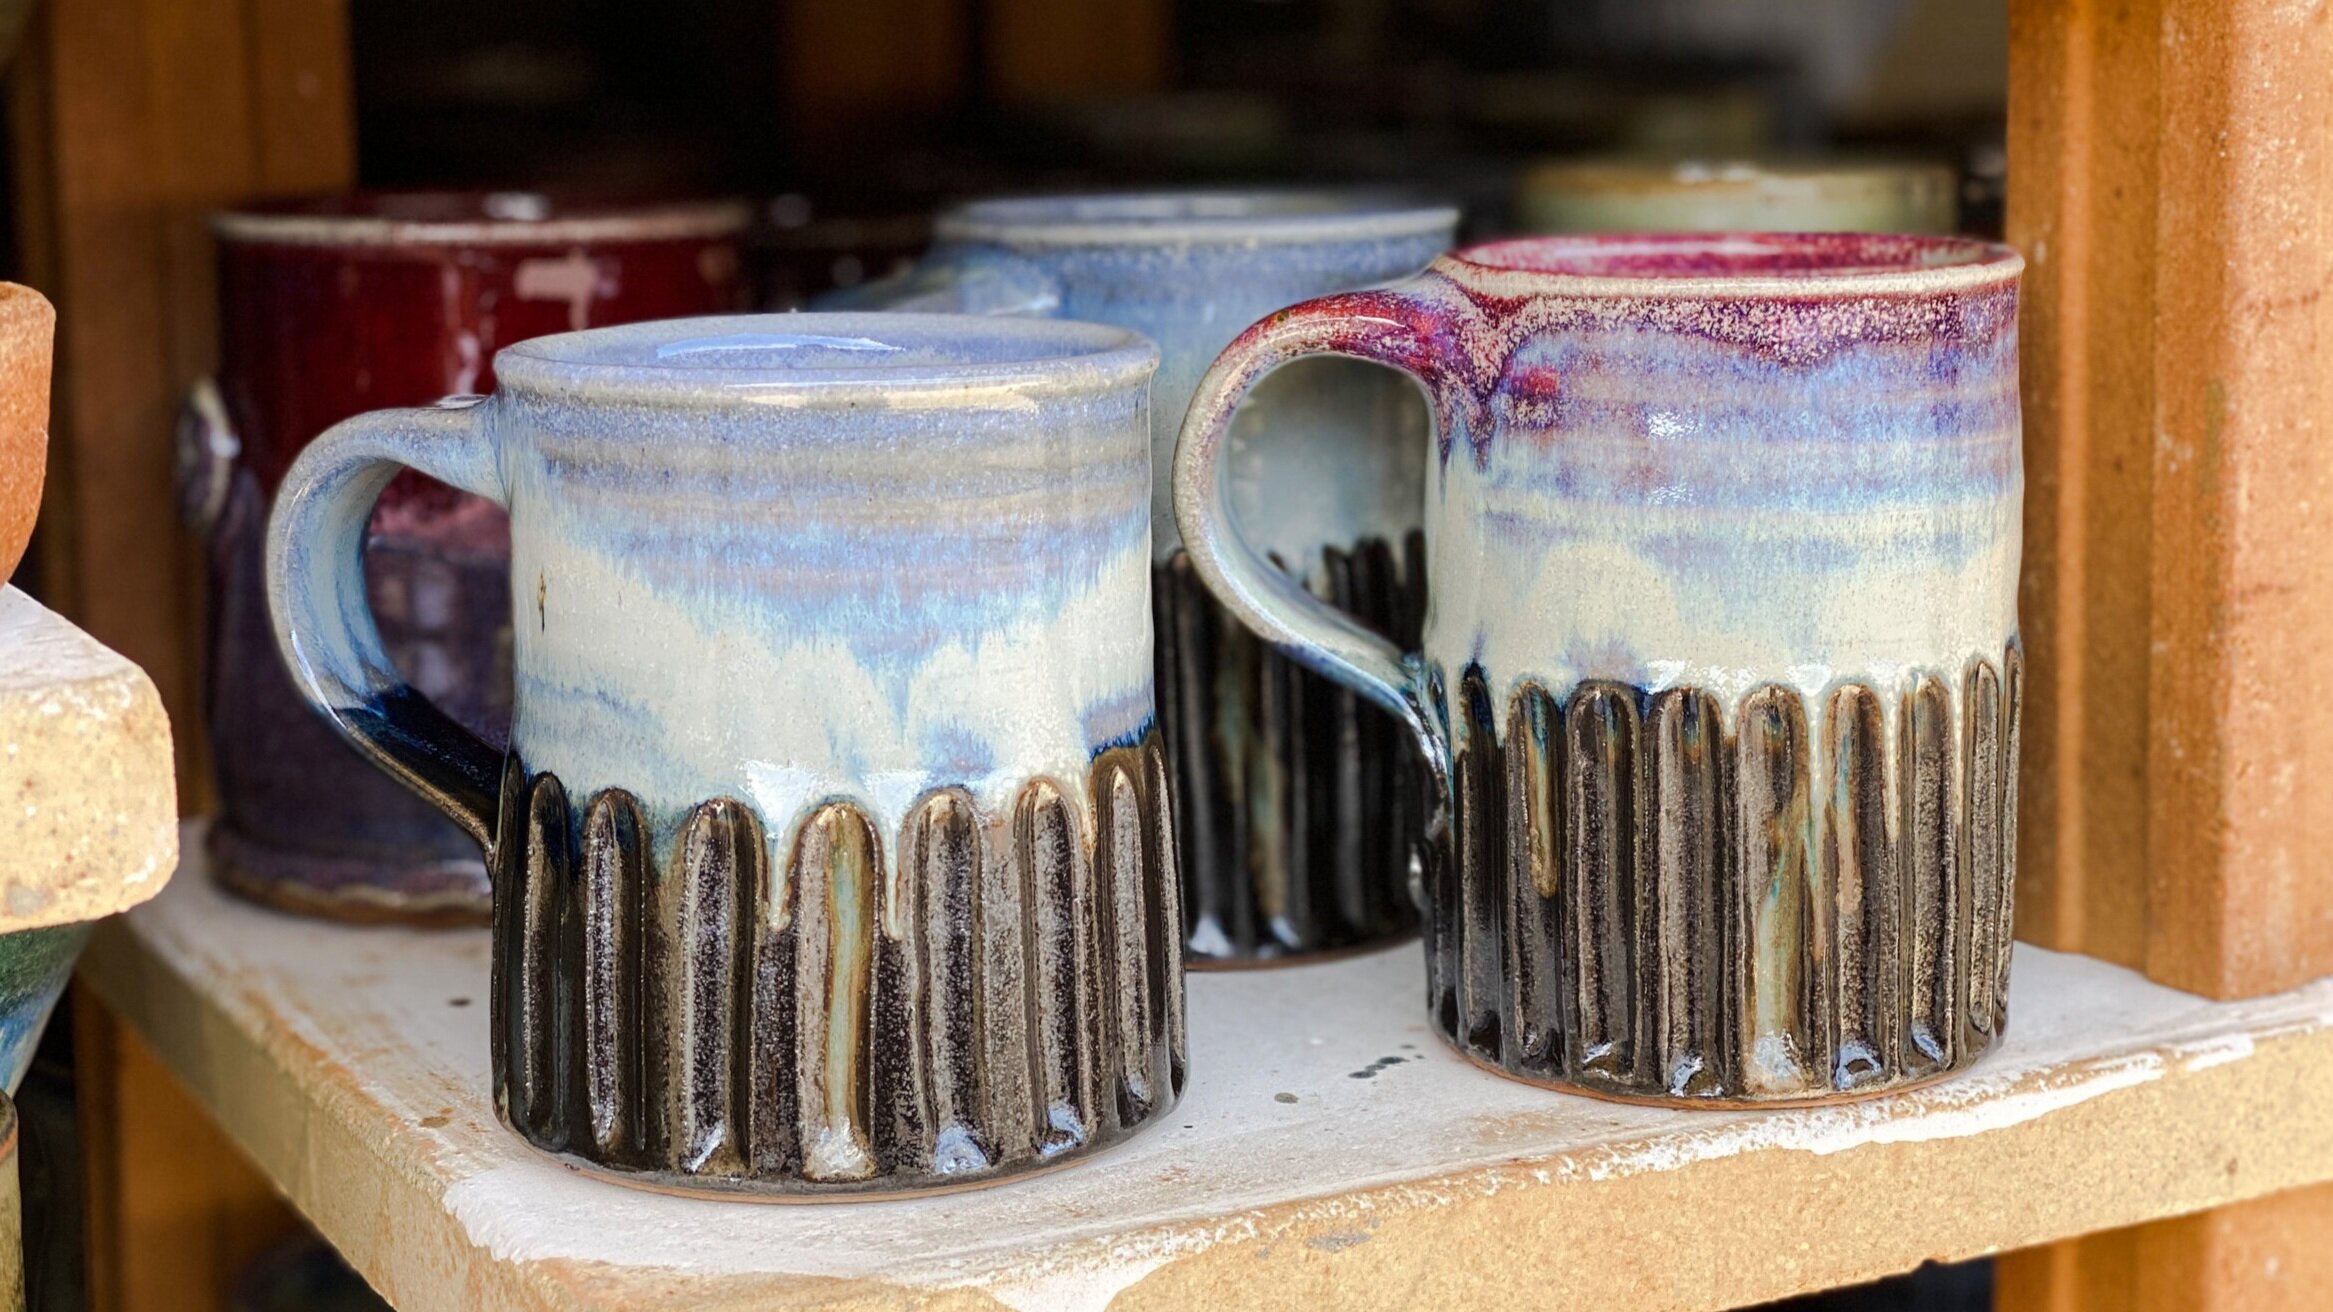
Dip-glazing a mug in a 10,000 gram of batch of glaze. This glaze will actually be red after it is fired!
“Where do you get your glazes,” is another question we often hear in the gallery. At Blue Sage Pottery, we mix our glazes using a few popular glaze recipes, but mostly our recipes, that we have developed over twenty years of pottery making. Some potters use commercially prepared glazes or glaze mixes that they purchase from ceramic suppliers, but we prefer to control our process and finished product. Our recipes come from both intentional experimentation and the cultivation of happy accidents! Glaze chemistry and calculation are part math, science, and art. It is probably the closest activity to medieval alchemy that exists today. We have a lot of fun experimenting with new colors and finishes!
How does the firing affect the color?
The first experience for most potters is to fire their glazed work in an electric kiln, and the results are generally less than exciting. After a few classes, the lucky pottery student gets to fire in a gas-fueled kiln in reduction. As we progressed from students to professionals, Kent and I began to understand that the amount of oxygen in the kiln and the firing atmosphere are the biggest factors in how an average glaze becomes excellent. Many firings have led to the ability to regulate the kiln's atmosphere and allow us to achieve the desired colors consistently!

Kent has just finished the hard work of loading the kiln and is getting ready to fire in this photo!
We generally fire our gas kiln as an oxygen-deprived or reduction atmosphere resulting in some awesome reds and purples. Using an iron red glaze rather than a copper red will create a more oxygen-rich environment. Different glazes need different amounts of oxygen to achieve their rich colors. The colors of our pots depend on the minerals added to the glaze during mixing and the amount of oxygen in the final firing.
Can you eat off the pots?
Another common question from our customers is, “Can you eat off of these?” Yes! We only use food-safe glazes that have been fired to the proper temperature. Our hand-made glazes are lead-free and barium-free. You can use them in the microwave and dishwasher, making incorporating our pottery into your daily routines easy! Coffee anyone?
These mugs are still warm to the touch! In this photo, we are letting the clay cool so that we can unload the kiln.
There is a lot more to glazes, but hopefully, this post answers the questions most commonly asked by our collectors.